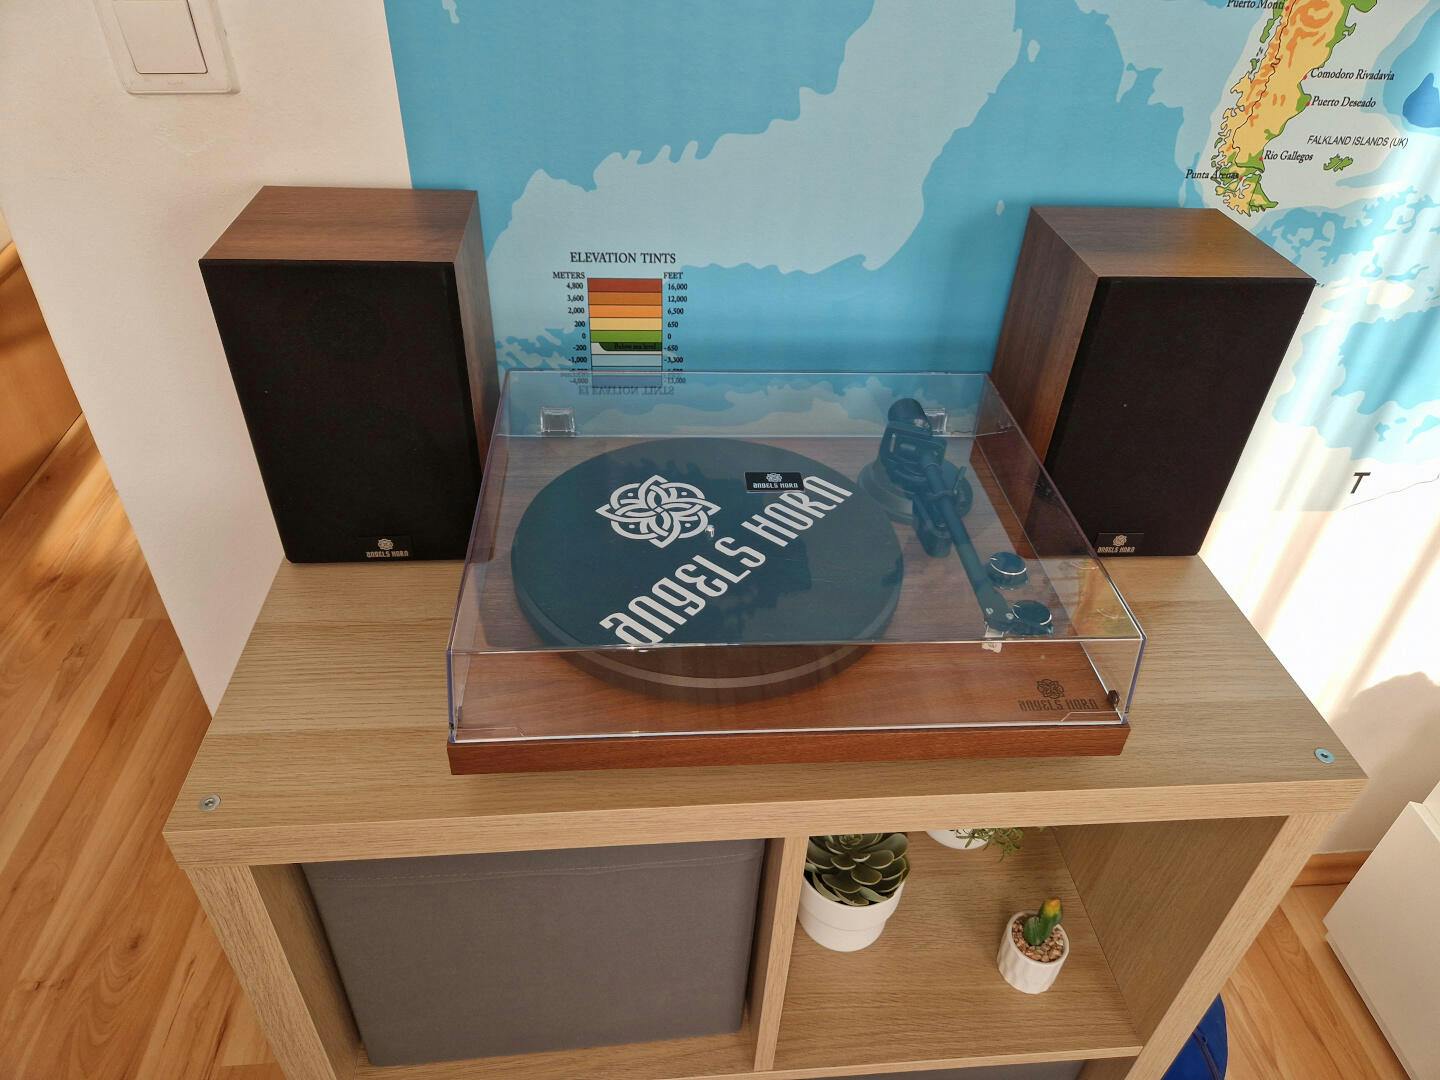
New Arrival|AngelsHorn® 【HP-H002】Bluetooth Record Player Installation
Introduction:
Thank you for purchasing this AngelsHorn HP-H002 Turntable Hi-Fi System. Read through this user manual before using the product to ensure its correct use. This instruction manual contains important information about safety, usage, and disposal. Use the product as described and keep this manual for future reference. This product can be used only in countries where the product is sold. Make sure that the operating voltage and the plug of the AC adapter of the product are correct for the country you live in.
HP-H002 Bluetooth Record Player Installation:
-Unpack all parts and remove protective material.
-Do not connect the unit to the mains before checking the mains voltage and before all other connections have been made.
-Those instructions arerelated only to products using power cable or AC power adaptor.
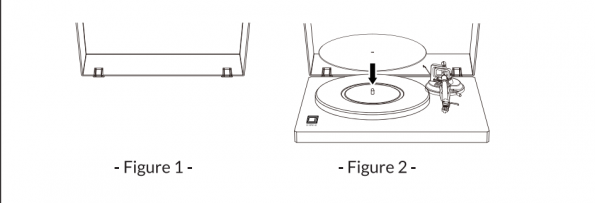
1-Installing the Lid Install the Lid carefully over the hinge prongs

2-Turntable platter and belt setup
1.Insert the sub-platter into the turntable spindlelocated in the middle of the turntable.
2.Loop the drive belt around the sub-platter and motor pulley.
3.Carefully place the main platter onto the sub-platter(Figure 1).
4.Place the slip mat on top of the platter(Figure 2)
3-Cartridge tracking force adjustment
The counterweight supplied is suitable for cartridges weighing between 3.0-6.0g
-Gently push and turn the Counterweight onto the rear of the tonearm (with the scale facing toward the front of the turntable).
-Remove the cartridge protection cap.
-Lower the tonearm lift and position the cartridge in the space between tonearm rest and platter.

Carefully rotate the Counterweight until the tonearm balances out. The tonearm should return to the balanced position if it is moved up or down.
This adjustment must be done carefully.
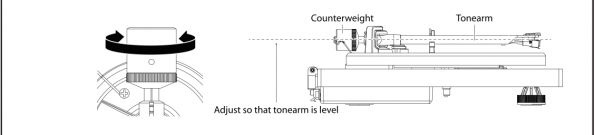
Once the tonearm is correctly balanced return it to its'rest. Hold the Counterweight without moving it,and gently rotate the Down force Scale ring until the zero is in line with black line on therear of the tonearm.Check whether the arm still balances out.

Rotate the counterweight counter clockwise (seen from the front) to adjust the down force according to the cartridge manufacturer's recommendations.One mark on the scale represents 0.05g of down force.
PS:
Note: The recommended down force forthe factory fitted cartridge is3.5±0.5g.
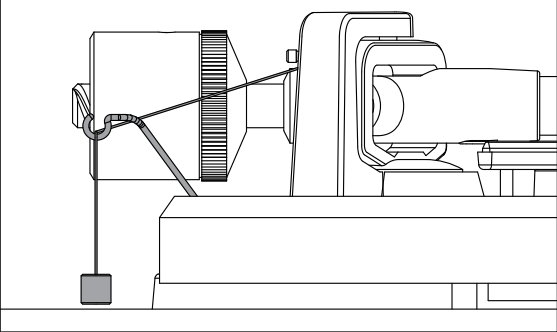
4-Anti-skating force adjustment
The anti-skating force must be adjusted corresponding to the tracking force as follows:

1.Slip the loop of the anti-skating weight's thread over the 3rd groove of the stub to set the correct anti-skating force for the factory-fitted cartridge.

2.Feed the thread through theloop of the wire support.
5-Connection to the Amplifier
This turntable uses a moving magnetic cartridge. Set the PHONO&Line Out Switch on PHONO mode.
Connect the phono out cables to the phono input on your amplifer of the pre-ampli-fier(phono stage).Line inputs such as CD, Tuner, Tape,or Video are not suitable for phono inputs. Make sure the amplification of the selected input matches the type of cartridge being used.
The factory-installed cartridge is 47k ohms/MM-input.

PS NOTE:
If your amplifier does not have an input suitable for phono cartridges, you will need to purchase a separate phono amplifier for moving magnetic cartridges. This separate phono amplifier will then connect between your turntable and your amplifier.
6-Stereo System Connection
Set the PHONO &Line Out Switch onLINE mode.The RCA PHONO &Line Out Jacks output analog line-level signals and could be connected directly with a par of active/powered speakers of the appropriate input of your stereo system.
The Red plug connects with the Right channel and the White plug connects with the Left channel.
PS NOTE:
The RCA Jacks are not designed to be connected directly to the passive/unpowered speakers on LINE mode. If connected to the passive speakers, there is no sound
7-Main Power Connection
The power adaptor is in the foam packing material.Unpack the power adaptor and plug the small end into the DC power jacklocated at the back side of the turntable. Plug the power adaptor into your power outlet.
HP-H002 Bluetooth Record Player Operation Turntable Operation:
1.Connect the included power adapter to theunit and press the power rocker switch to be"ON" position.
2.Remove the needle cover from the cartridge.

3.Place the slipmat on the platter and place a record on the slipmat. Ifusing 45 RPM records, but the 45 RPMadapter on the center spindle before placing the record on the platter.
4.Set the 33/45 RPM Selector according to the type of record.
5.Unlock the arm clip and set the Lift Lever to the up position.
6.Position the tonearm over the desired location(groove)on the record. The platter will begin spinning.
7.Move the tonearm lift lever to the down position to move the tonearm toward the record. Alternatively,place the needle over the desired location on the record.
8. Carefully lower the tonearm on the record.
9.When youare finished playing the record, raise the tonearm, return it to rest on the arm clip.
HP-H002 Bluetooth Record Player Bluetooth Operation :
This unit has a Bluetooth transmitter to send audio to a Bluetooth speaker wireless ly.
1.Power on your Bluetooth speaker and ensure it is in pairing mode.
2. Power on the unit,the turntable will pair with your Bluetooth speaker automatically, the BT indicated blue light flashing.
3. When pairing, the light will flash twice per second, then change to the steady light indicating that the Bluetooth is paired with the device
4. If after 2 minutes no Bluetooth speaker can be found to pair with the Bluetooth transmitter will become inactive and the blue light turns to red, and the red light means it powered
5. To disconnect pairing, power off the turntable or turn off Bluetooth pairing on your Bluetooth speaker.
Maintenance and Cleaning
Your turntable requires little or no regular maintenance. Remove dust with a slightly damp antistatic cloth. Never use a dry cloth, this will create static electricity and attract more dust!
Antistatic cleaning agents are available at specialist stores, but must be applied sparingly to avoid damage to rubber parts. It is recommended to install the needle cover before cleaning or maintenance is carried out to avoid damage.
If the turntable is not used over a long period of time, the drive belt should be removed to prevent unequal stretching.
NOTE: If your amplifher does not have an input suitable for phono cartridges, you will need to purchase a separate phono amplither for moving magnetic cartridges. Ihis separate phono amplifier will then connect between your turntable and your amplifier.
Useful Tip The turntable should be positioned on a low-resonance surface such as wood or multiple layer ply board to avoid structural vibrations disturbing playback.
HP-H002 Bluetooth Record Player Cartridge Replacement
- Before replacement, put the stylus protector back on the stylus to prevent damage to the stylus during the replacement process.
2. Carefully remove the wire leads from the original cartridge.
3. Loosen the two screws on the headshell that are securing the cartridge and then remove the original cartridge.
4.Mount the new cartridge to the headshell and tighten it lightly. Do not completely tighten the screws at this moment.
5. Connect the wire leads to the new cartridge's terminals. The wire lead color codes are as below:
White Left channel positive(L+)
Black Left channel negative (L-)
Red Right channel positive (R+)
Black Right channel negative (R-)
6. Adjust the cartridge's position to make sure it is precisely aligned on the headshell so that the stylus will be tracking the grooves in parallel perfectly.
To achieve this, place the included paper cartridge alignment protractor over theturnta-ble spindle, carefully lift the tonearm and place the tip of the stylus on the points marked 130mm and 250mm respectively.
Fine-tune the cartridge's position on the headshell until the cartridge is perfectly in parallel with the reference lines at both points.
7. Tighten the screws completely once the perfect alignment is achieved.
PS:
If you are unfamiliar or uncomfortable with completing this procedure, we recommend consulting with a professional to perform the installation.
HP-H002 Bluetooth Record Player Troubleshooting :
Potential Incorrect Use and Fault Conditions: These turntables are manufactured to the highest standards and undergo strict quality controls beforeleaving the factory. Faults that may possibly occur are not necessarily due to material or production faults but can sometimes be caused by incorrect use or unfortunate circumstances. Therefore the followinglist of common fault symptoms is included.

For AngelsHorn Vintage Gramophone Shop Products:
Angels Horn Store:

Bring music to life.
AngelsHorn Mission
AngelsHorn offers a variety of record players, each with an elegant, retro-style designed to provide a high-quality music experience.
Our record players are decorative, functional, and environmentally friendly, a perfect combination of classic record players and modern audio technology. Choose the AngelsHorn record player to make your life more colorful!
AngelsHorn, Better Products, Better Service, Lower Prices!


Leave a comment